Awesome Crusty Bread
| Ingredients:
|
|
Variations: Use1/3 cup of black sesame seeds, or poppy seeds on loaf. Soak seeds to activate the night before.
When not using a bread maker:
- Sift flours and mix all dry ingredients well
- Mix olive oil into warm water. Add to dry ingredients. Knead dough well 10-15/60 out of drafts
- Flour the base of loaf tin, before putting the dough in. Place dough into baking tin to rise.
- Keep dough warm for best rising. Warm oven to 50 degrees C and turn off. Let dough rise for 45 minutes in the warmed oven or until doubled in size. (If camping, place dough in the baking pan then into a large bowl with glad wrap over the bowl. Place towels over the whole lot to keep it warm, but not touching the dough in order to give space for the dough to rise. In very cold weather {if enough water available} I place a hot water bottle outside the bowl under the towel. Camp oven instructions/pictures next pages)
- When the dough has adequately risen, turn the oven heat to 170 degrees C to bake the bread leaving the risen dough in the oven.
- Bake 20 minutes and check or turn the loaf around. Cook for another 10-15min.
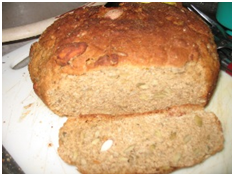
- Loaf should be golden. A cooked loaf will have a hollow sound when you tap it sharply with the back of a spoon or your knuckles
- Turn out onto cooling rack. When cool, wrap in clean tea towel and store in a plastic bag or bread container. When I am the only one eating my home baked bread, I find that keeping it in the fridge keeps longest, unless the weather is cool.
Serving suggestions:
Great toasted; topped with miso, Power Pesto, avocado, or Happy Hommos, and served with Pumpkin and other soups. Also delicious with peanut butter and honey, sesame and date mix, sugar free jam and avocado, eggs and tomato etc.
Awesome Crusty bread is almost a meal by itself! We love it. It is also a grounding, or solid food for balancing after eating fruit or light green salad, with pesto or other choice of topping.
CAMP OVEN BAKING TIPS
 Picture 1: Choose a camp site where it is safe to have an open fire. This was a ‘red dirt’ outback camp in Western Australia. Sunlight blessings on the camp. No, it was not an easy style of life for a writing retreat. It was affordable, naturally quiet, isolated and plenty of nature to appreciate.
 Picture 2: While the fire was blazing to make the coals, a hole was dug into the ground to minimise heat loss. The hole also helps to prevent excess heat on one side developing from a breeze blowing onto hot coals. The coals may look dead in the light of the sun, but they are cooking hot! Mum taught me to place several small heat tolerant stones on the floor of the camp oven to elevate the round baking dish and avoid unnecessary burning of the food on the bottom. For example, roast vegetables lightly covered with olive oil and sprinkled with Chinese Five Spice. We also placed a double layer of foil inside the baking tray beneath the vegetables (for easy cleaning afterwards) and foil over the top (for the first twenty minutes). Then remove the top foil to allow some browning of the vegetables. Here, the camp oven was placed onto a bed of coals in the hole, then coals were shovelled around the lower third of the camp oven. Next, the raised bread dough was placed into the camp oven. The lid was put on.
 Picture 3: Hot coals were shovelled onto the lid of the camp oven. When checking, or removing loaf, care was taken to avoid ash and coals falling onto the food. I check the loaf at twenty minutes. It can be cooked in half an hour to forty minutes, depending on the heat of coals and the strength of any breezes. Some wood burns much hotter than others, so beware. ‘Snake wood’ tree burns hotter than most out there.
 Picture 4: Job well done. Dust out camp oven, then smear with cooking oil to prevent rust. Store away from water…it does rain out there sometimes! Chuckle and smile.
Picture 5: Yummy! Fresh bread ready to eat! A real treat when the nearest corner store with any choice, was a four hour drive away!